
IP Scanner can watch your home network around the clock and alert you whenever a device joins or drops off. We call this Home Radar. It combines three features: Network DVR for history (Pro or Ultra), Remote Scans so your iPhone can read results from your Mac (free in every edition), and push notifications so you find out the moment something changes (Ultra).
There's no dedicated setup screen for Home Radar. You enable a few settings across the Mac and iOS apps, and they work together. This page walks you through it in six steps.
Home Radar is useful every day for seeing what's on your network, but it really proves its value in moments like these:
You changed the locks, but did you change the Wi-Fi password? A phone that used to connect to your home network reappears while you're at work. Home Radar sends a push notification to your iPhone and Apple Watch the moment it connects, so you know before you walk through the door.
A laptop that should no longer have access to your office network connects at 2am. The daily briefing flags overnight activity so it's the first thing you see in the morning, not something you discover weeks later by accident.
You're on vacation and want to know your home network looks normal. Open IP Scanner on your iPhone, check Remote Scans, and see what's connected right now, or scrub through the Network DVR to review the entire week you were away.
Your network should have a predictable set of devices: your TV, your thermostat, your family's phones. When something you don't recognize appears, Home Radar tells you immediately. Name your known devices during setup (Step 6 below), and anything new stands out instantly.
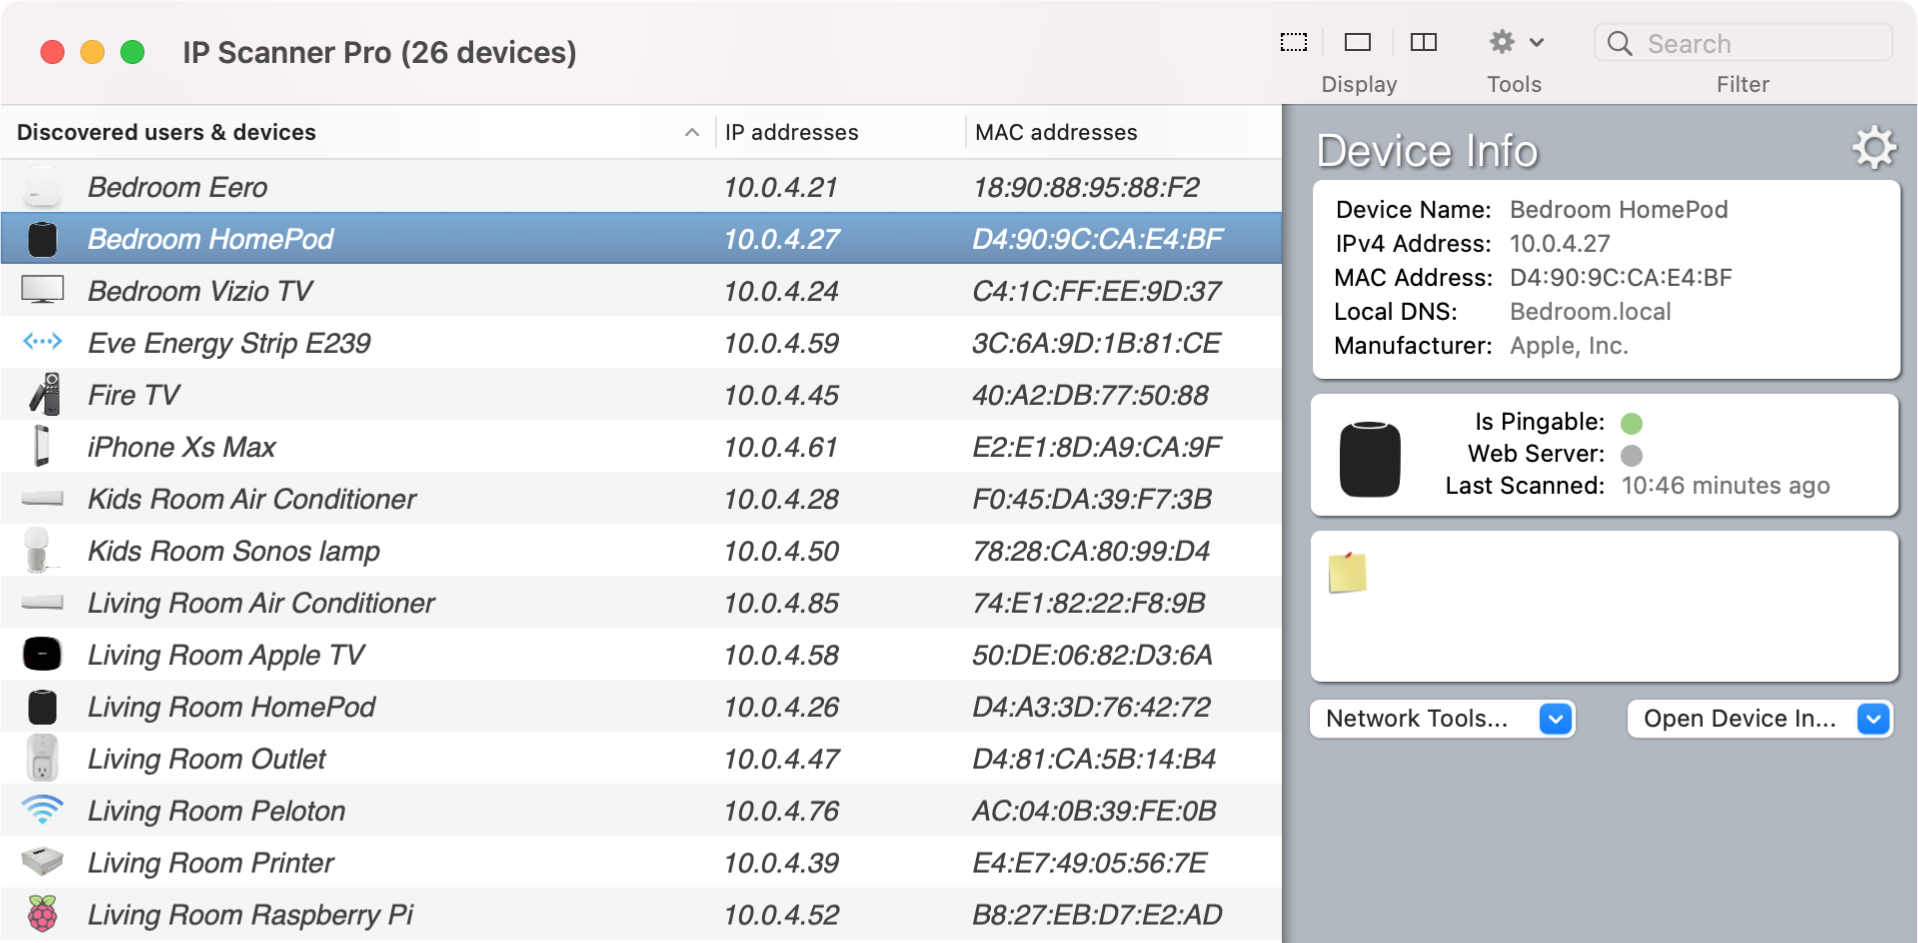
IP Scanner scans your network continuously while it's open. You don't need to press a button or set a timer. Just launch IP Scanner Ultra on a Mac that stays on (a desktop, Mac mini, or a laptop that doesn't sleep), and leave it running.
That Mac becomes your always-on network observer. It sees every device that connects or disconnects from your Wi-Fi.
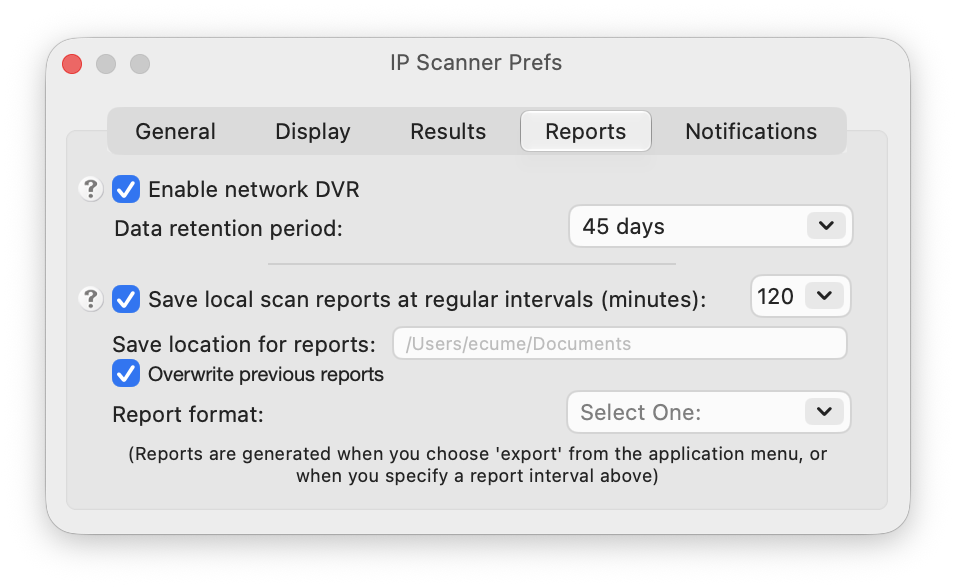
The Network DVR records a timeline of every device that appears and disappears on your network. Without it, IP Scanner only shows you a live snapshot.
Set the Data retention period to however far back you want history. The default is 45 days.
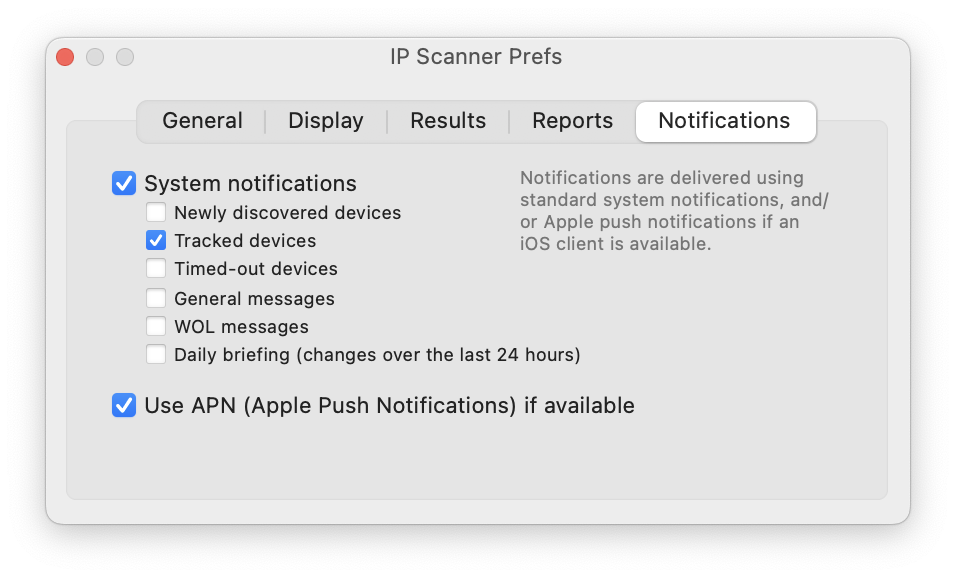
This is the part that turns IP Scanner from a tool you open into a tool that reaches out to you. The settings are in two places, one on your Mac and one on your iPhone.
Check the boxes that matter to you:
Also check:
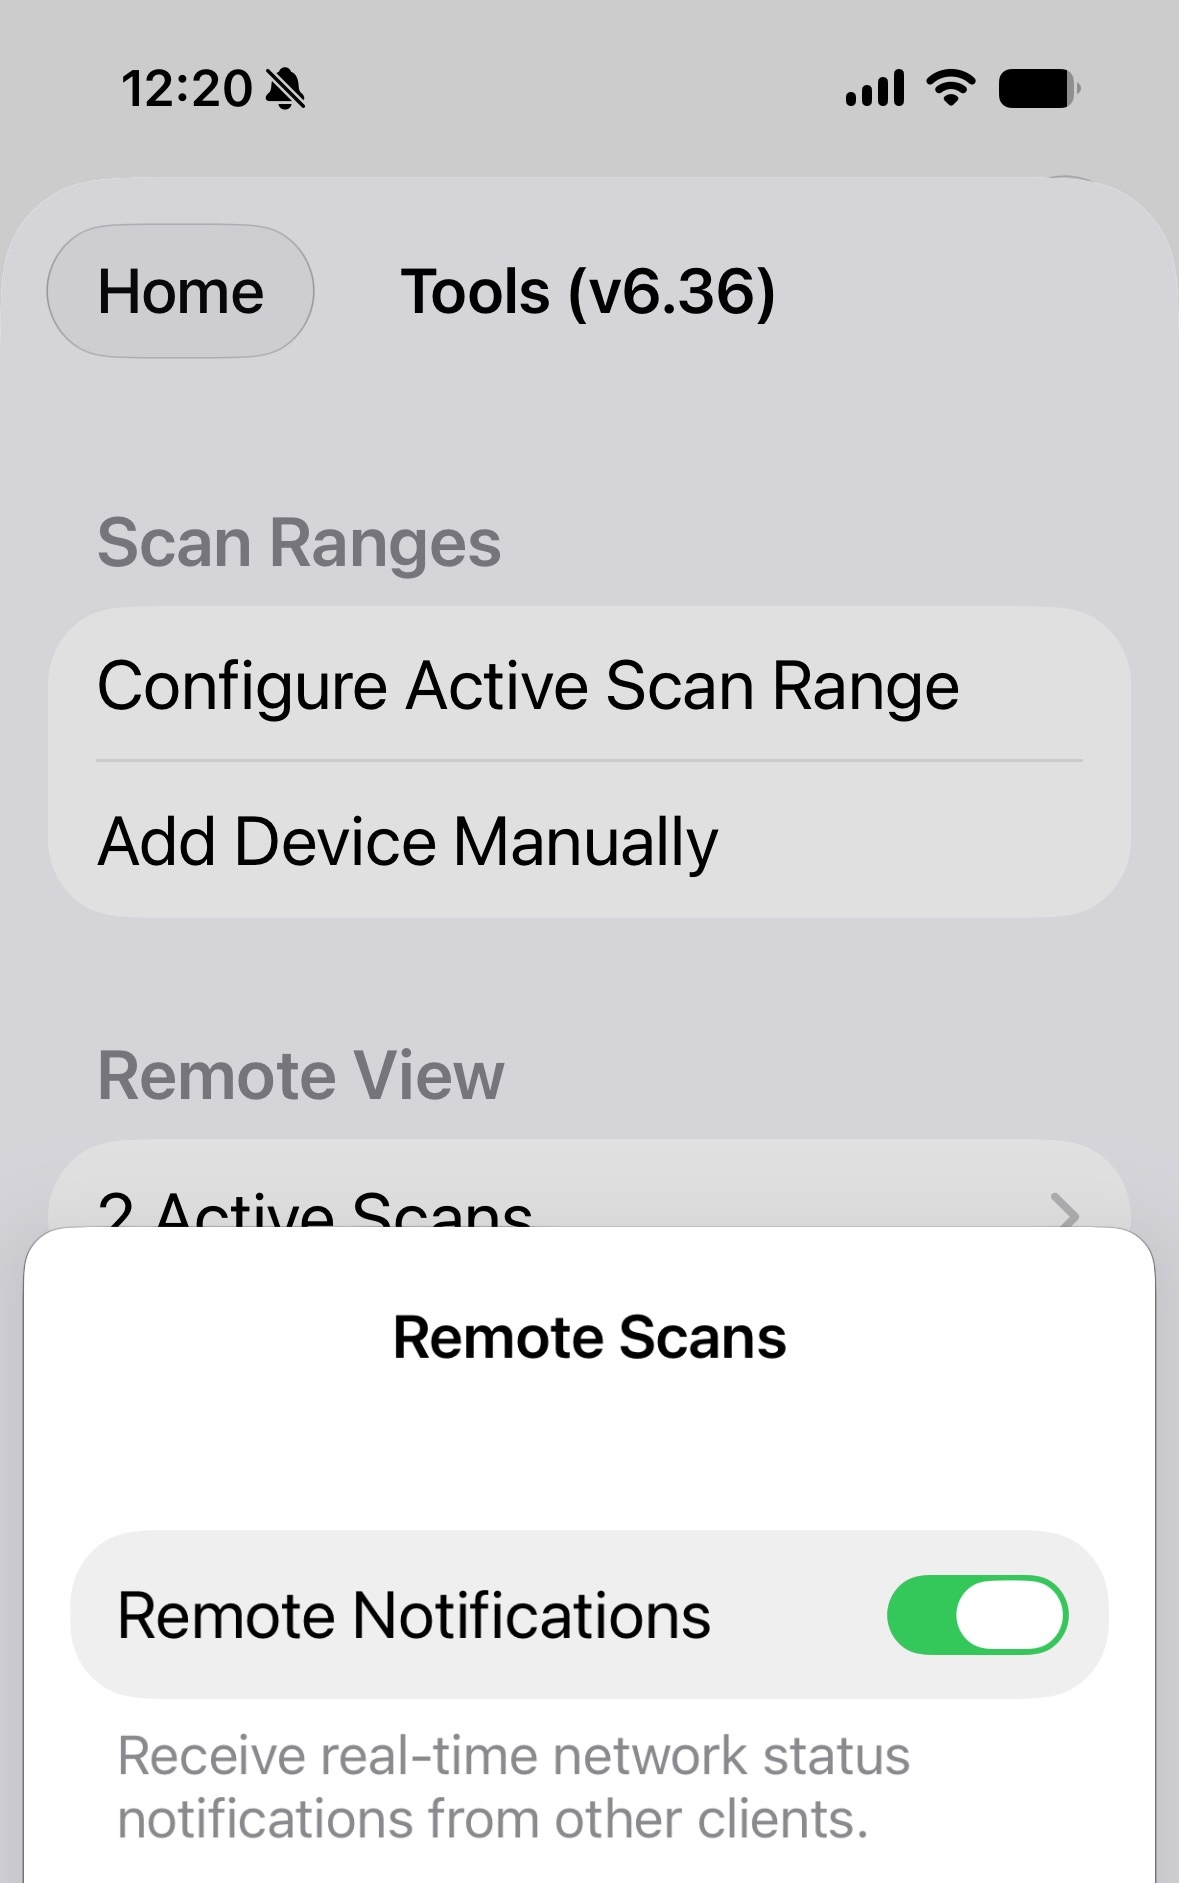
On your iPhone, open IP Scanner, tap Tools (top right), then under Remote View, tap the row that shows your active scans (e.g. "2 Active Scans"). Find the network your Mac is publishing and toggle Remote Notifications on.
This tells your iPhone to accept the push alerts that your Mac is sending through iCloud.
The first time IP Scanner tries to send a system notification, macOS will show a permission dialog asking whether to allow it. Click Allow.
If you missed the dialog or clicked "Don't Allow" by accident, you can fix it in System Settings → Notifications → IP Scanner and toggle Allow Notifications on.
The easiest way to see Home Radar working: turn Wi-Fi off on your phone, wait a minute, then turn it back on. On your Mac, IP Scanner will notice the phone disappear and reappear. If you enabled "Timed-out devices" and "Newly discovered devices," you'll get notifications for both events.
If push notifications are working, the alerts will also appear on your iPhone (once it's back on Wi-Fi or cellular) and your Apple Watch.
IP Scanner discovers devices by IP and MAC address, but a list of numbers isn't very helpful when a notification says something new joined. Give your known devices friendly names so alerts read "Living Room TV joined" instead of "192.168.1.47 joined."
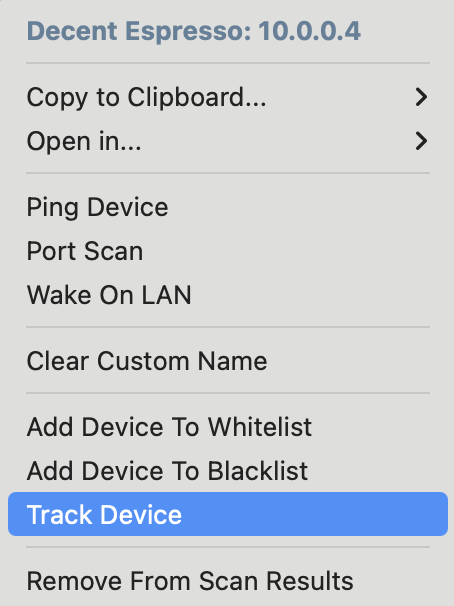
On your Mac, right-click any device in the list and choose a name. IP Scanner remembers it by MAC address, so the name sticks even if the IP changes.
Once Home Radar is set up, one of the most useful things it does is the daily briefing. Every morning, IP Scanner sends a single notification summarizing what changed on your network in the last 24 hours: new devices that appeared, devices that left, and anything else worth noting.
It's a quick way to stay aware of your home network without opening the app. If nothing changed, you won't get a briefing, so it never becomes noise.
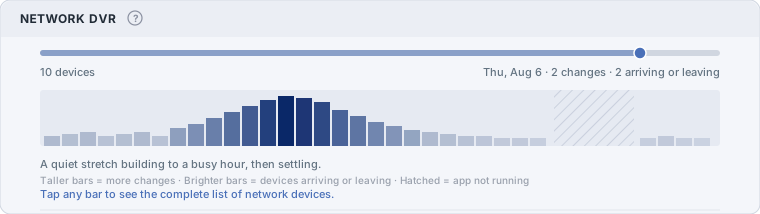
The Network DVR keeps a rolling timeline of everything that happens on your network and shows it as a density ribbon next to each device. Bright bars mean the device was active; gaps mean it was absent. Hatched sections mark stretches when IP Scanner wasn't running, so you can tell the difference between "this device was offline" and "the app was closed."
You can scroll back through days or weeks of history, depending on your retention setting. It's useful for understanding patterns: which devices are always on, which come and go, and whether anything unexpected showed up while you were away.
Remote Scans is the bridge between the Mac that's watching your network and the iPhone in your pocket. Your Mac publishes its scan results to your own private iCloud container. Your iPhone reads them from anywhere, over cellular or any other Wi-Fi network.
Nothing passes through a 10base-t server or any third party. The data lives in your iCloud account, encrypted by Apple, and only devices signed into the same Apple ID can see it.
Learn more about Remote Scans →
Check three things: (1) On your Mac, make sure "Use APN (Apple Push Notifications) if available" is checked in Prefs → Notifications. (2) On your iPhone, make sure Remote Notifications is toggled on for your Mac's scan in Tools → Remote View. (3) In iOS Settings → Notifications → IP Scanner, make sure notifications are allowed.
Hatched sections mean IP Scanner was not running during those periods. The app scans continuously while it's open, but if it gets closed or the Mac sleeps, scanning stops. For uninterrupted coverage, keep IP Scanner open on a Mac that doesn't sleep.
Make sure IP Scanner is running on your Mac, both devices are signed into the same Apple ID, and iCloud Drive is enabled on both. It can take a minute for the first sync to appear.
Right now, notifications apply to all devices on your network. A future update will add a Watchlist that lets you pick specific devices to receive alerts about. For now, naming your devices (Step 6) makes it easy to spot the ones you care about in the notification list.
Yes. IP Broadcaster can run alongside IP Scanner on your Mac, or on a separate Mac. It shares MAC addresses with all your IP Scanner clients and can act as the headless data provider behind Remote Scans, so you get full device identification (manufacturer names, not just IP addresses) across all your Apple devices.
Get IP Scanner Ultra for MacDownload IP Scanner for iPhone
IP Scanner Ultra is a one-time purchase. No subscription, no account, no ads. ← Back to IP Scanner